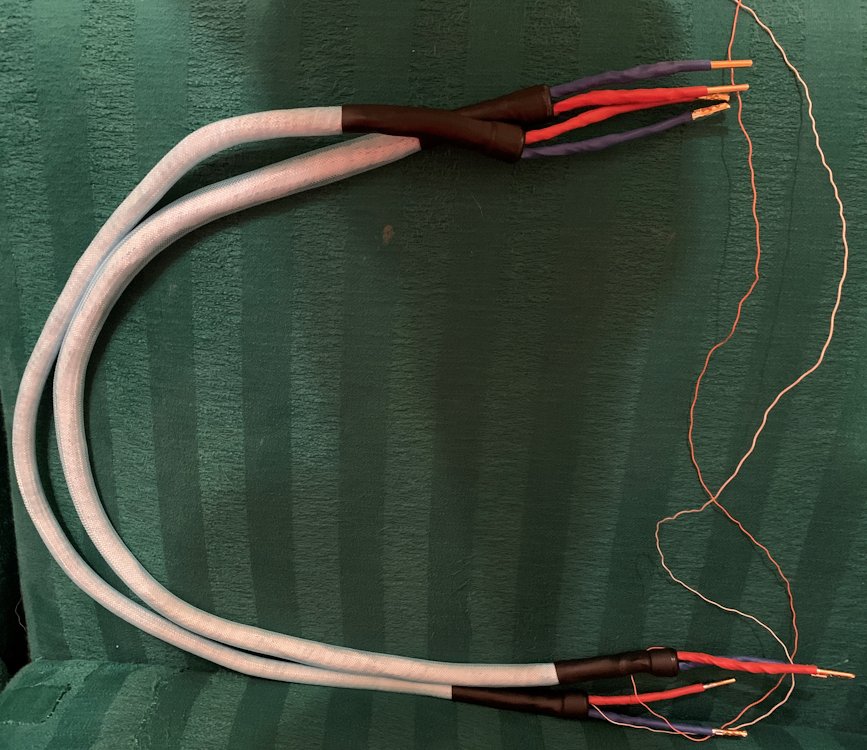
TNT Vibradamper Speaker Cables
Were we right or not?
[ Home | Staff & Contacts | HiFi Playground | Listening tests | DIY & Tweakings | Music & Books ]

Product: Speaker Cable
Producer: not for sale, TNT-Audio DIY design
Manufacturing cost: approx. 100€ for pair
Author: Piero Canova - TNT
Italy
Published: December, 2020
Many many times in the last years we audiophiles tried to explain to common people that connecting our equipment using two pieces of electrical wire didn't sound the same as when we used a proper dedicated interconnect cable. In the same way, a speaker connected to the amplifier using a piece of flat cable from your chandelier wasn't performing at its best. A few weeks ago we had a major rewiring of our offices and the company doing the job installed some Cat 6 cables for improved speed of data transmission. It stirred my curiosity and I began to search the net for more information. Here is the description of a manufacturer of those cables about how they could achieve such high performance:
"to obtain cables with such high performances, every step of the production process is carefully carried out, from the drawing of the conductors to the extrusion of the dielectric. For our Cat7 cables the dielectric is gas expanded PE foam using skin-foam-skin technology (as used in coaxial cables, differently from lower-class Ethernet cables)."
Doesn't it sound very audiophile to you? Careful drawing of conductors has a lot to do with surface smoothness and skin effect, and the quality of the dielectric with dielectric effects. In short, many of the things we always said about how to make a good cable for our systems is becoming vital for high-speed data transmission. I found also that some manufacturers use OFC Copper (99,99%), dielectrics like LLDPE or PTFE, and controlled twisting pitch of the wires. I had the impression that there was plenty to fish for our application in this big pond of specialty LAN cables.
Let me clarify one thing: I am not a very big fan of cables and I don't think they are the most important part of my system. They are unfortunately necessary and don't offer any improvement since they just subtract-from or worsen the signal. My goal is to find the least-worsening ones at a reasonable cost; my big money is where the signal is generated or processed or transformed in sound. I made myself many many cables and have tested even more; from time to time I have some fancy ideas which I try, normally with poor results but this experiment is so convincing that I wanted to share it with you.
The goal is to make a speaker cable using as raw material high-quality Cat6 cable but also with some innovative contents. Speaker cables are some of the most complicated cables to build and also technically the most challenging. It is a cable that has the task of transmitting a complex signal with the same quality as an interconnect but on top of this it has also to handle some quite large wattages. In the DIY section of TNT-Audio you can find a very good article about the main characteristics of a good speaker cable; it was written some 20 years ago by Thorsten Loesch and, thankfully, since physics hasn't changed so far here they are:
"A (universally) good Speaker-Cable has a low Resistance and Inductance (though a certain balancing Act is recommended for Speakers with a non-resistive impedance) and moderately low Capacitance.
It will ideally employ multiples of very thin
round Conductors with individual insulation or use thin Foils.
It will not use multistranded Conductors and it will minimize both Skin-
and Maxwell- Effects."
I wanted also to achieve another two goals: the cost had to be no more than 100€ a pair of 2 meters in length and the sound had to be on par with the best ones I had tested. Ambitious? Yes, but worth trying so let's start working.
The first and basic ingredient is this:
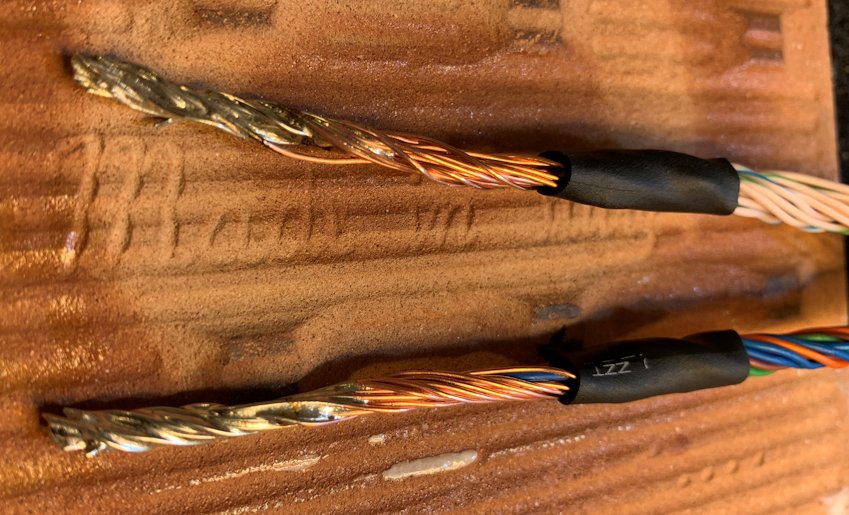
I have chosen a Cat6 cable without screening with conductors in OFC Copper 4N (99,99%); dielectric is LLDPE. 4N Copper has a very good purity degree for our purposes. It is possible to find OFC Copper wires in 5N or 6N purity but normally they are made in very small AWG diameters and they are horrendously expensive. Perfect for the coils of a MC cartridge but here we will use tens of meters of cable. On top, we need them twisted in pairs and the pitch of twisting and its consistency has an effect in the final result so better to leave it to some automatic equipment. The choice of LLDPE as an insulating material is in relation with its dielectric characteristics. Fluorinated polymers like PTFE definitely have a better dielectric constant than LLDPE but, I am sorry to disappoint you, the vast majority of what we buy as "Teflon" isn't PTFE but rather other fluorinated polymers definitely have better processability at the industrial level and much lower costs. So, while PTFE has a dielectric constant of 2.1 and LLDPE being at 2.3 (which means it is worse by 9.5%), if the fluorinated polymer used is PFA or MFA the worsening is just by 5% so reasonably acceptable. AWG gauge of each single conductor is 23 so we should not have any influence of skin effect until approx. 45,000Hz. To be on the safe side I made some tests using enameled wires AWG 28 without noticing any difference.
The second ingredient is this:
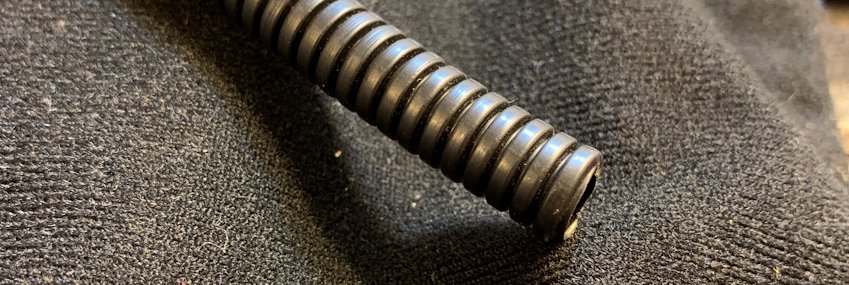
To begin measure the length of cable you need. Add some 20cm as safety norm since a cable too long can be bent while a short one will spoil your day. Cut the conduit in lengths 20cm shorter than the final cable you need. Insert the electric wire inside the conduit to have it emerging from the conduit on one side by a few cm while at least some 50cm on the opposite one. Seal the conduit on the side with the short cable with some hot melt glue and when it is cold cut the cable so the end of the conduit will be flat. Pour the sand in to fill a third of the space inside the conduit and seal the side with the long cable again with hot melt glue. Double-check that the sealing is good on both sides since to have some sand spilling in your living room is quite annoying and to refill it is very complicated. You should see something looking like the image here-below:
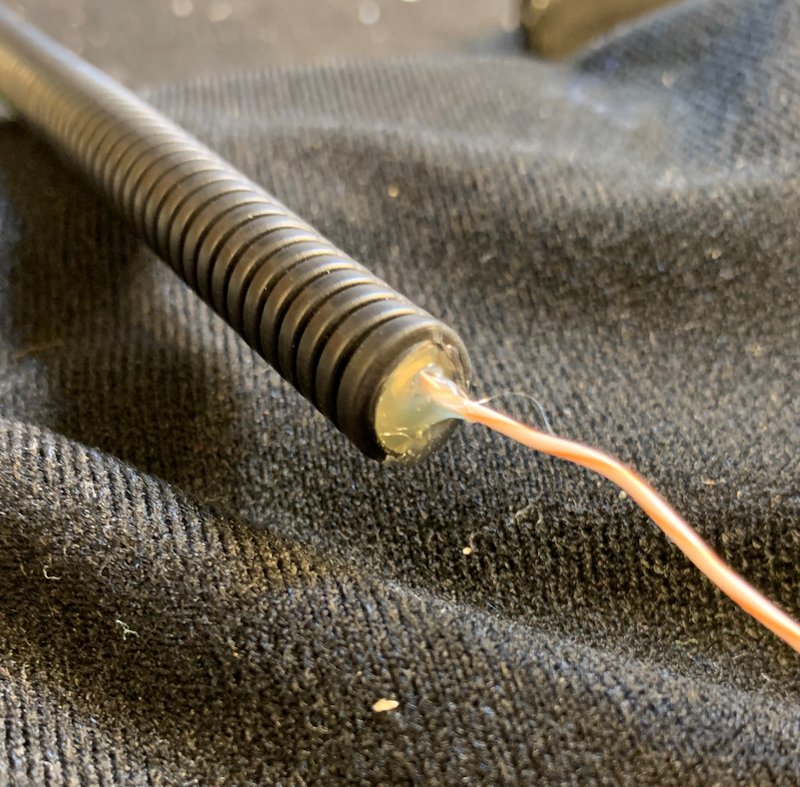
The sand we poured inside will dampen the vibrations being transmitted through the cable. We all agree that vibrations are an enemy to fight in every possible way and to reduce the amount transmitted through speaker cables from our speakers to amplifiers.
Now we can cut the Cat 6 cable in lengths equal to the length of the final cable. For safety add some 5-10cm for final adjustments. The number of pieces of cable needed depends on the AWG gauge you want to achieve. My goal was to reach AWG 11 so I had to sum 16 conductors, each of AWG 23. Since you have 4 pairs of AWG 23 wire in a Cat6 cable you need 4 cuts of Cat6 cable per channel. Mark with a pencil the direction of the pieces you cut to have copper conductors having been extruded in the same direction. With a cutter get rid of the external sheath: it is enough to to indent it and with a bit of pulling it opens easily. Just be careful not to damage the wires inside by cutting too deeply. Collect the sheath and the plastic inner filling and dispose of them in a plastic recycling bin since they are recyclable. Now you have 4 pairs of wound wires, one colored and one mainly white. Unwind the spiral of each pair on each side by half of the length difference between wires and conduit. If your wire pairs are 120cm long and your conduit is 100cm long you unwind (120-100=20 20/2=10) 10cm on each side.
Now begins the Zen side of the assembly. Cut some cm of insulating tape and begin to fix each pair to the conduit keeping them parallel to the conduit. Now we can start to wrap conduit and wires with plumbers tape keeping the wires parallel to the conduit. Fix the wires at the other end with some insulating tape. The outcome should look like this:
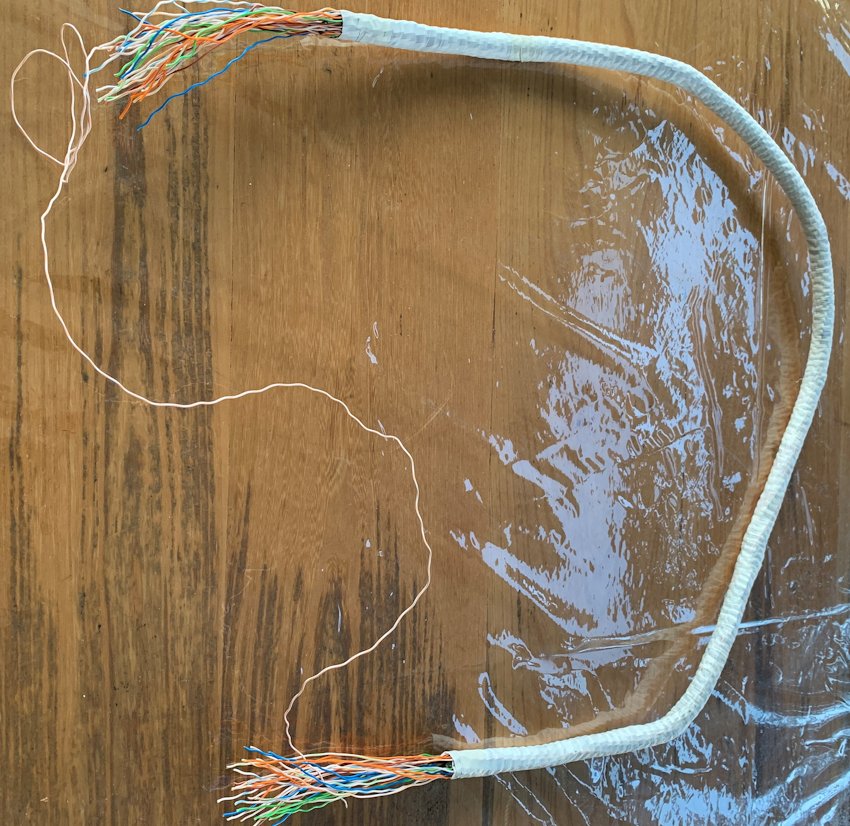
Now we need to remove the insulation from every single wire: to avoid any dent on the surface of the conductors I use a soldering iron. Please remove at least 5cm of insulation. Now we need to separate colored wires from white ones and we wind them together. Fix them with some tape or some heat-shrink tubing. Please check with a multimeter that there is no short circuit. I do repeat it; PLEASE CHECK WITH A MULTIMETER THAT THERE IS NO SHORT CIRCUIT BETWEEN THE TWO CONDUCTORS. It is very important for your safety and your mood since to short your power amp can be dangerous and it is for your mood worse than losing a football match at the 95th minute for an offside goal. Finally, solder the wires of each side and cut the single copper wires longer than the others. Functionally the cable is finished and my terminations look like this:

Now we can finish the cable from the aesthetic side and with the terminations we prefer. A sheath on the outside of the color you prefer, two heat-shrink sheaths red and blue for the two channels and your preferred connectors. My favorites are the plugs from Vacuum State: Swiss made, low mass, excellent material and gold plating, all for just 24€. To close the gap between cables and conduit I used some rubber caps like the ones you put at the end of the legs of a chair. Just drill a hole in it and fix it with some black heat-shrink. Finally, peel some 5cm of the insulation from the long cable we installed in the middle of the conduit. This is how my terminations look:
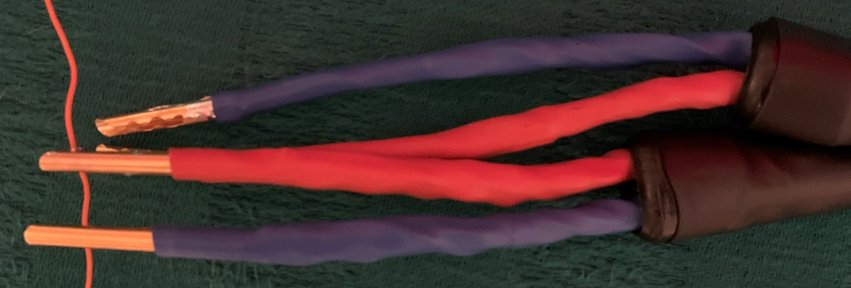
Let's add the costs: I paid for the Cat6 cable approximately 1€/m so for 2m cables we have 60€. Plugs from VacuumState are 24€, sheaths and other small costs add a further 8€. Total is 92€ so well within our range.
Technically our construction using thin twisted pairs minimizes inductance and gives a moderate capacitance. The finished cable is approximately 30mm thick but is light thanks to the absence of screens and very flexible since conduits are designed for being easily bent. In this way we won't over-stress our connectors as sometimes happen with very stiff cables. We have thin single conductors minimizing in this way the influence of Skin and Maxwell effects. The twisted pairs use common-mode rejection to reduce external interference without screens. The conductors are made of excellent grade copper and the insulating material has one of the best dielectric constants. The conductors are radially disposed to minimize common interactions; the cable inside the conduit will act as a collector of electric and magnetic fields radiating toward the inside of the cable. Since there is no grounding post in power amps I have connected them to the metallic structure of my rack. Finally, we have a vibration dampening system reducing vibrations transmitted by speakers to power amps.
How do they perform: to say they are excellent is obvious. Very neutral, no emphasis in any frequency, fast, very very fast; these are true full frequency cables. The stage is wide and deep to the limits allowed by your system and your room. With center wire connected you add some cleanliness to the reproduction. The only negative is that they need some serious break in: after two days they are good but the best begins after some 100 hours. Are they perfect: certainly not. But I did test them against some exotic cables worth thousands of € in some megabucks systems and the match was at least even.
Now we need to wait for the next step in LAN networks to get some new and interesting raw materials to play with.
DISCLAIMER. TNT-Audio is a 100% independent magazine that neither accepts advertising from companies nor requires readers to register or pay for subscriptions. After the publication of reviews, the authors do not retain samples other than on long-term loan for further evaluation or comparison with later-received gear. Hence, all contents are written free of any “editorial” or “advertising” influence, and all reviews in this publication, positive or negative, reflect the independent opinions of their respective authors. TNT-Audio will publish all manufacturer responses, subject to the reviewer's right to reply in turn.
© Copyright 2020 Piero Canova - piero@tnt-audio.com - www.tnt-audio.com
[ Home | Staff & Contacts | HiFi Playground | Listening tests | DIY & Tweakings | Music & Books ]